
I recently was presented a discussion regarding the lack of Telnet client on Windows Server 2008/R2 and 2012/R2 and a peer fighting to get a 3rd party application installed on a Server. I very quickly responded that the Telnet client is still included with Windows as a feature and only needs to be enabled.
Installing the Telnet Client
The Telnet Client is not enabled(installed) by default on Windows Vista / 7 / 8 / 8.1, or Windows Server 2008 / 2008 R2 / 2012 / 2012 R2. The procedures to install Telnet Client vary based on the operating system you are using.
Install Telnet Client by using a command line
- Open a command prompt window. Click Start, type cmd in the Start Search box, and then press ENTER.
- Type the following command:
pkgmgr /iu:“TelnetClient”
- If the User Account Control dialog box appears, confirm that the action it displays is what you want, and then click Continue.
- When the command prompt appears again, the installation is complete.
To install Telnet Client on Windows Server
- Start Server Manager. Click Start, right-click Computer, and then click Manage.
- If the User Account Control dialog box appears, confirm that the action it displays is what you want, and then click Continue.
- In the Features Summary section, click Add features.
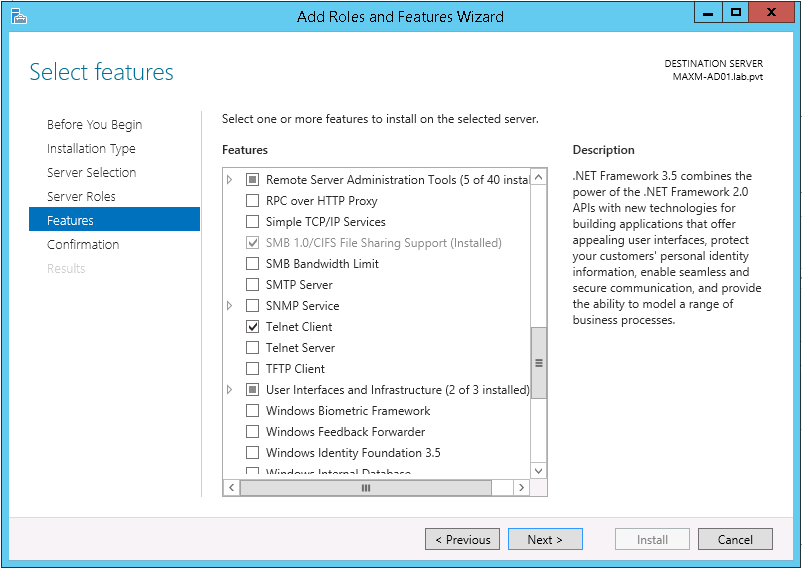
- In the Add Features Wizard, select Telnet Client, and then click Next.
- On the Confirm Installation Options page, click Install.
- When installation finishes, on the Installation Results page, click Close.
Windows Server 2012 / 2012 R2
Windows Server 2008 / 2008 R2
